Are you looking for How To Upgrade Laptop BIOS? The Basic Input / Output System (BIOS) is crucial to every computer. It starts up the computer and controls how data moves between the operating system and any connected gadgets. Over the years, as hardware and software have become more complicated, the BIOS has changed from simple firmware to a more complex and important part of how computers work. To Upgrade Laptop BIOS, the procedure given in the article should be followed:
How To Upgrade Laptop BIOS?
Keeping a computer’s BIOS updated ensures hardware and OS compatibility. These updates can also make the system run faster, work better with other gear, fix bugs, and add security patches. Their health and how well computers work depend on them.
To Upgrade Laptop BIOS
- Go to the manufacturer’s website: Go to the company’s main website that made your motherboard. Visit the support or downloads page.
- Pick out the type of your motherboard: Type in the type of your motherboard.
- Get the correct BIOS update: Visit the BIOS update page and pick the most recent update.
What are BIOS updates?
Updates to BIOS firmware improve hardware-software interaction. They are necessary for adapting the system to new technology and frequently incorporate advanced features like a secure boot in newer UEFI systems.
Most current systems use UEFI instead of BIOS. It has advanced functionality and a more straightforward interface. UEFI firmware updates are similar but often provide secure boot and network functions. Today, BIOS and UEFI are interchangeable.
BIOS updates can cause system instability if interrupted or incorrectly applied. Follow the update instructions carefully to avoid power outages and other disruptions. BIOS updates often include firmware security patches. These updates can prevent unauthorized access and maintain system security.
How To Check Your Current BIOS Version?
System information applet in Windows:
The Run dialog box opens with Windows + R
- Type msinfo32 and enter. This opens System Information.
- Check the System Summary for BIOS Version/Date. This page shows the BIOS version, release date, and manufacturer.
The BIOS/UEFI menu
- Restart your computer.
- Press the BIOS or UEFI firmware key repeatedly during booting. The standard keys are F2, Del, Esc, and F10. If you have trouble entering the BIOS setup, visit your computer or motherboard instructions. Manufacturers vary.
- Keys vary by motherboard and computer maker. Knowing the key is important because F10 may launch a boot menu instead of BIOS settings on some computers.
- To navigate, use the keyboard arrows after entering the BIOS or UEFI settings. This environment may lack mouse functionality.
- Locate the ‘Main’ or ‘System Information’ tab or section. The name may vary, but this part usually includes system information like the BIOS version. Your BIOS/UEFI menu’s landing page usually lists this version.
- Note the displayed BIOS version. This information is essential for determining the BIOS update.
- Exit BIOS setup after noting the version. Look for ‘depart Saving Changes’ or ‘Exit Discarding Changes’ to depart. To avoid accidentally changing settings, exit without saving. The computer will reboot and restart everyday use.
When Should You Update Your BIOS?
BIOS updates aren’t routine, unlike application or graphics driver updates. Only update your PC or motherboard if your PC or motherboard maker recommends it or if you see a Windows update issue. Motherboard manufacturer instructions vary for BIOS upgrades.

Prepare a second device with information on all BIOS recovery methods before starting. BIOS updates don’t usually improve PC performance and aren’t suggested for working systems. It’s best to upgrade the BIOS only to solve faults or add hardware compatibility.
How Do I Know If My BIOS Needs Updates?
Update your BIOS if you need to repair critical security vulnerabilities or replace your CPU. CPU support lists and BIOS versions for CPU upgrades are frequently provided by motherboard makers. If your computer runs well, you may not need to update your BIOS.
How To Update Your BIOS? Step-By-Step
This section will walk you through updating your BIOS if you have issues with random crashes, bugs, memory, or security.

Start BIOS updates
- Determine model and manufacturer
- We’ll start with manufacturer and model identification. Several methods are available: Command Prompt and System Info.
Find BIOS/UEFI version in Command Prompt
- Windows + R opens Command Prompt. Click OK after typing cmd.
- Confirm the BIOS version by typing wmic bios, getting smbiosbiosversion, and pressing Enter.
- An assortment of letters and digits follows. The BIOS version is SMBIOSBIOSVersion. Note the BIOS version—for example,sion: 1.23.1.
Find the BIOS version/date in the System Information
- Start System Information by pressing Windows + R. Type msinfo32 and click OK.
- Visit manufacturer support to download updated files.
- Depending on the company that produced your computer and the version of your installed BIOS, you may need to search for the correct BIOS update link.
- If you have a bespoke computer, check the manufacturer of your motherboard. A Google search for [manufacturer] + BIOS or UEFI + update usually works.
Extract files
You may need to unzip the BIOS update files from the folder after downloading them from the manufacturer’s website:
- Open the downloaded ZIP file.
- Select the Extract tab at the top of the window and click Extract All.
- Select a destination folder for file storage and confirm by clicking Extract. The downloaded BIOS update folder opens directly.
Transfer to formatted USB
Put the BIOS on a USB stick after downloading. To finish this step, do the following:
- Insert your USB drive, right-click in File Explorer, and select Format.
- Make sure FAT32 is chosen in the File system drop-down option.
- Press Start to reformat the drive if needed.
- Copy and paste the downloaded BIOS file into your USB.
Access the BIOS menu
This section can help you check your computer’s specs and access the BIOS. There are two methods to access the BIOS:
- boot sequence
- Windows
Through boot sequence
- Press Restart after clicking the Windows Start button.
- Press the BIOS startup key supplied by the computer or motherboard manufacturer.
- The predominant keys are F1, F2, F10, F12, Del, or Esc.
Find your computer’s BIOS key by Googling for its manufacturer, model, and BIOS key. Restart and try another key if the BIOS doesn’t launch.
Using Windows
- Click on Start and then click on Settings.
- Select Update & Security.
- Select Recovery on the left panel. Select Advanced Startup > Restart now.
- Choose Troubleshoot in Windows Recovery.
- Select advanced options.
- Choose UEFI Firmware Settings and then click Restart.
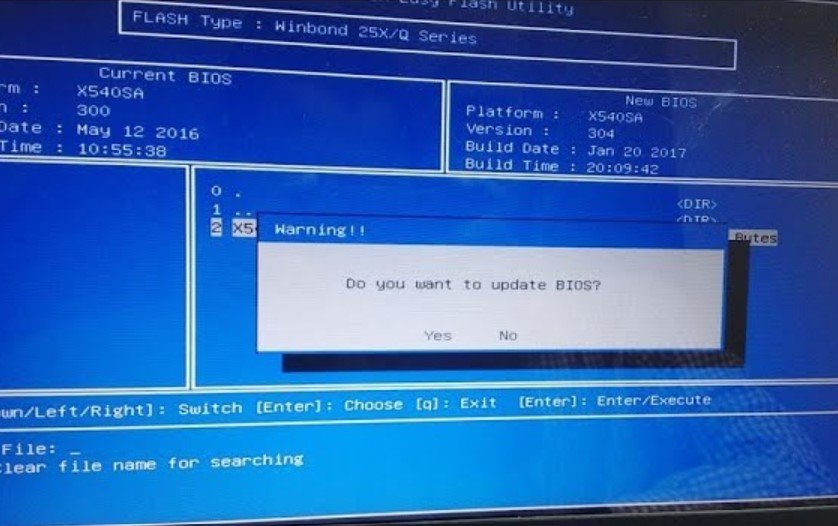
- Install the update
Complete the update installation now. Each BIOS program is slightly different depending on your device and how the BIOS screen is accessible; see your computer or motherboard’s help site for information.
BIOS updates often entail these steps
- Go to the Boot tab and verify your USB device. Enable any backup options that appear.
- Click Advanced, select USB setup, and select BIOS update. Let your computer’s BIOS finish updating.
If your machine needs extensive BIOS updates, this can take several minutes to over an hour. After updates, your computer should restart, but you may need to confirm. Don’t power off your computer when updating your BIOS—it can corrupt the BIOS and prevent installation.
BIOS Flashback Update
If your motherboard supports BIOS Flashback, you can upgrade BIOS without starting or installing a CPU. This method makes BIOS upgrades easy without hardware or software. Update your BIOS via BIOS Flashback:
- Get the BIOS update file from the website of the maker. Choose the motherboard model-specific version.
- If needed, rename the BIOS update file to the manufacturer-specified name.
- Copy the BIOS update file to a USB flash device. Format the flash drive to FAT32 for compatibility.
- Connect the USB flash drive to the motherboard’s BIOS USB port. The BIOS Flashback button is usually near this port.
- Find the BIOS Flashback button on your motherboard. It usually has the BIOS Flashback icon.
- Start upgrading by holding the BIOS Flashback button for a few seconds.
- The BIOS Flashback LED light will flash during the upgrade, signaling progress.
- Allow the BIOS Flashback process to finish.
- Check for errors after updating. Additional LEDs or codes may indicate the update status on some motherboards.
Conclusion
Updating your laptop’s BIOS improves performance and adds functions. Best practices and precautions are essential for a successful upgrade. First, check your BIOS version, then download the newest version from the manufacturer’s website.
Please choose the proper laptop update method depending on its specs and model. Follow the instructions when updating BIOS/UEFI, BIOS Flashback, or Windows software.
Maintain a consistent power supply and avoid interruptions during updates. Update your BIOS regularly to improve your laptop’s operation and security, optimizing your computing experience.
Top FAQ’s
DO BIOS changes boost performance?
BIOS updates don’t continually improve PC performance. They fix error messages, update visual and audio drivers, and enhance device compatibility. SSD and HDD data shouldn’t be affected by BIOS updates.
Do BIOS updates require a USB?
BIOS updates don’t always require a USB, mainly if you utilize Windows-based flashing via the internet. Check the computer’s maker and model to see if you can update the BIOS without a USB.
Does BIOS update restart the PC?
BIOS updates don’t restart computers or alter HDD or SSD data. However, changing your BIOS may impact an overclocked CPU, making your device unstable and unable to boot.
Do I require BIOS updates before installing a CPU?
You must update your BIOS before installing a new CPU. A newer CPU may not work or be supported if your BIOS is obsolete, preventing booting. Most motherboard makers post the CPU support list and the BIOS version you need to update on their website.


