How To Turn Off Memory Integrity In Windows 11? Easy Guide
In this article, we’ll explain How To Turn Off Memory Integrity In Windows 11? Hypervisor-protected code integrity, another name for memory integrity, is a technique used to defend your system from malicious code attacks. It also aids in guaranteeing the reliability of all device drivers that are installed on the operating system.
This feature is turned on by default in Windows Security for all new machines that run Windows 11. However, a lot of people complained that Windows 11’s memory integrity feature was disabled and could not be enabled.
How To Turn Off Memory Integrity In Windows 11?
To turn off memory integrity in Windows 11, follow the steps:
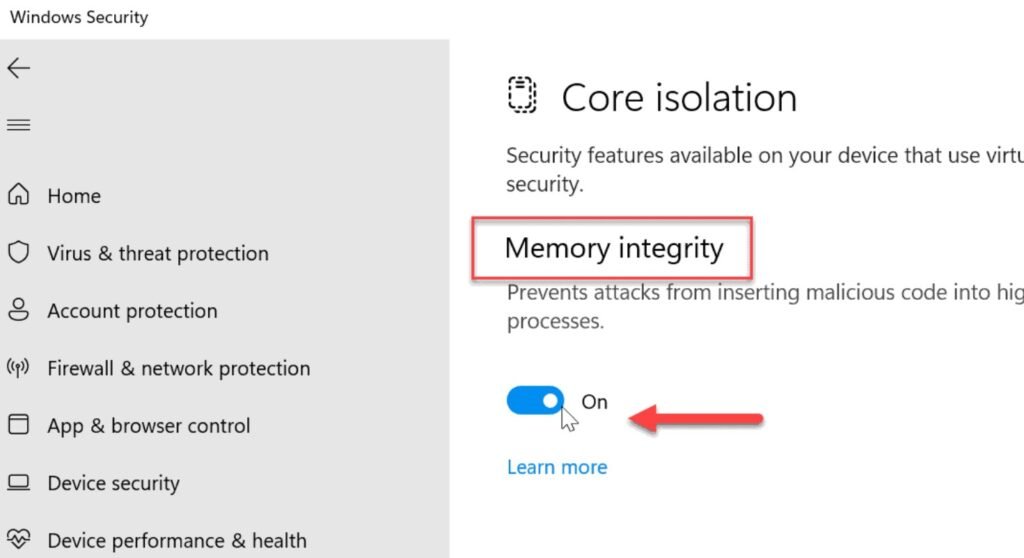
- Open Windows Security.
- Select Device Security from the left menu.
- You can see Core isolation information when you go to Core isolation.
- Make sure the memory security switch is turned off.
What is Memory Integrity on Windows 11?
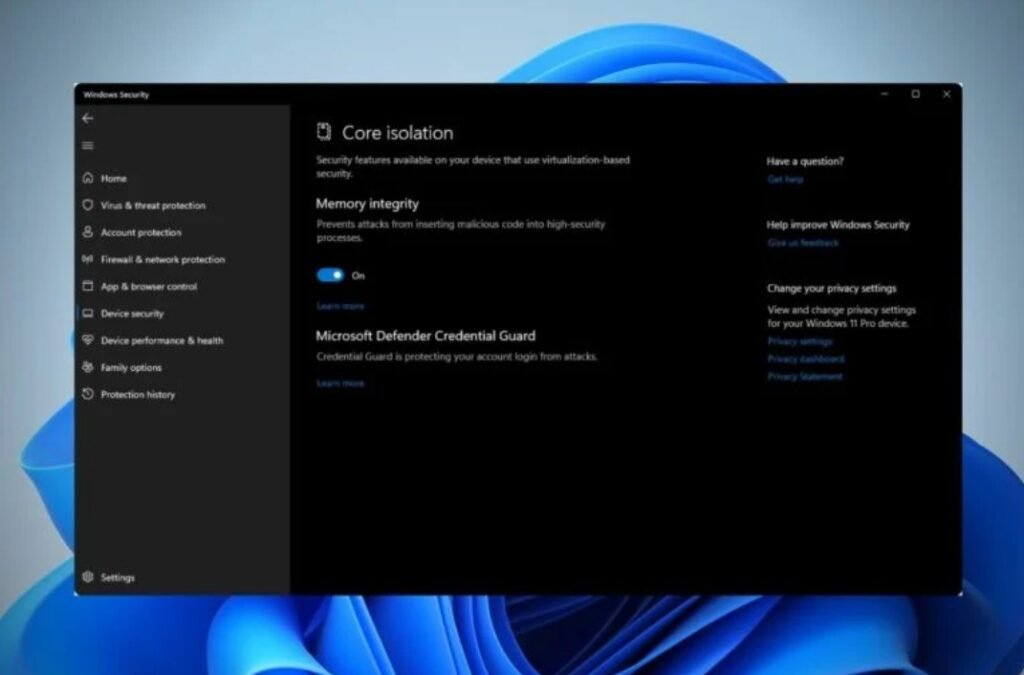
As part of its Core Isolation feature, memory integrity limits the execution of kernel memory pages to passing an integrity check, hence thwarting attempts to inject and run malware in high-security processes. For added security protection, the functionality also operates essential functions in a virtualized environment.
In technical terms, that means it guards user data against risks from harmful programs and hacker attempts. It stops malware from taking control of processes with high security. For instance, it protects features like memory access protection, secure boot, and more by utilizing hardware virtualization capabilities.
Unless there’s a compelling reason not to, like better gaming performance, you should leave the memory integrity core isolation function enabled; it’s also crucial to remember that virtualization requires support from your CPU and that your BIOS or UEFI firmware must have virtualization enabled.
Additional hardware capabilities like Data Execution Prevention (DEP), secure boot, and TPM 2.0 are needed to utilize memory integrity.
In order to implement the core isolation and memory integrity feature, the majority of contemporary PCs also support virtualization and other prerequisites. Additionally, Microsoft has included the memory integrity function in Windows 11 by default.
What Causes the Windows 11 Memory Integrity Not Turning on?
We’ve investigated many user reports and discovered that incompatible drivers are typically the cause of the issue. Other elements, such as out-of-date software, corrupted system files, and incompatible systems, are also to blame. Remain calm. We list a number of related fixes here.
How to Fix Windows 11 Memory Integrity Is Off?
If Windows 11 Memory Integrity cannot be enabled, how can it be fixed? Here are six tested methods. Until the issue is resolved, let’s attempt each one in turn.
Check All Incompatible Drivers
As was previously said, out-of-date or incompatible drivers are the primary cause of the Windows 11 Memory integrity not turning on the problem. Thus, it would help if you did the following to identify the incompatible drivers:
- Step 1: In the search bar, type security. Next, choose Windows Security. Finally, click the Device security option in the right panel.
- Step 2: Select Memory Integrity and click on Core isolation details.
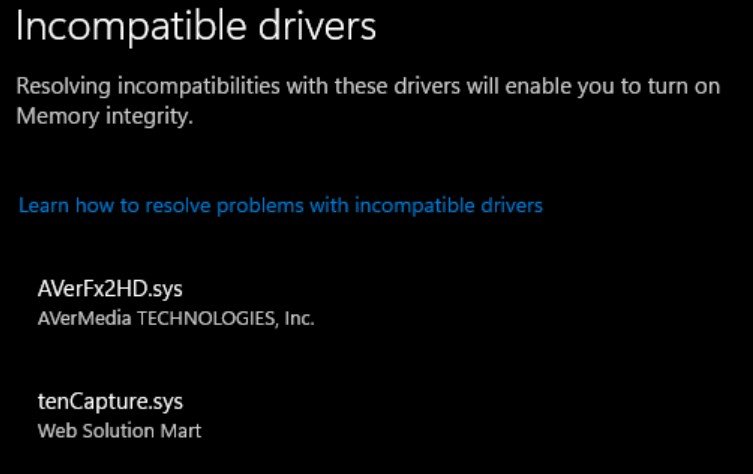
- Step 3: Click Review incompatible drivers if you get an error message stating, Resolve any driver incompatibilities and scan again.
- Step 4: At this point, you must list every driver that causes the Memory integrity is off Windows 11 problem. Then, you can continue with the following steps to resolve the driver problems.
- Step 5: From the bottom left corner, right-click the Start button. Choose Device Manager. Then, click View and choose Show Hidden Devices.
- Step 6: To finish the process, right-click the faulty driver, choose Uninstall device, and then adhere to the on-screen instructions. If it still doesn’t work, you can choose Update driver and keep the driver up to date.
Remove All Incompatible Drivers
If the Device Manager is unable to assist you in removing the mismatched drivers, use Command Prompt or Autoruns. Some users of answers.microsoft.com have attested to the usefulness of this technique. Let’s give it a go.
Method 1: Use Autoruns to Uninstall Incompatible Drivers
- Download Autoruns for Windows by clicking this link, then install the program by following the on-screen directions.
- Open the Drivers folder by running Autorun as an administrator.
- The drivers that are having issues will be emphasized. To disable the incompatible drivers, uncheck the box next to each one.
- To check if the Windows 11 Memory integrity is greyed out issue is resolved, close the application and restart your computer.
- If Memory Integrity Windows 11 is still not enabled, right-click the incompatible driver and choose Delete.
Method 2: Use CMD to Uninstall Incompatible Drivers
- Enter cmd in the Command Prompt search bar and right-click Run as administrator. In order to verify it, click Yes.
- To view a list of all third-party drivers on Windows 11, execute the following command into the elevated Command Prompt window and press Enter. Make a note of the drivers who are giving you trouble.
- dism /online /get-drivers /format: table
- You can use the following command to remove the drive that is causing Windows 11 Memory integrity to be off.
Look for updates for Windows
According to some customers, updating Windows can resolve the Windows 11 Memory integrity cannot be turned on issue. To accomplish this task, launch the Settings window by pressing the Win + I keys, choose Windows Update from the left panel, and then click on Check for updates from the right panel.
Execute a Clear Boot
Sometimes, incompatible third-party drivers and applications are the only reason Windows 11 Memory integrity won’t switch on. To rule out this factor, you could try a clean boot. After identifying the incompatible software, you can remove it from Windows 11.
Repair the System Files
An error message stating that Windows 11 Memory integrity is greyed out may appear if specific crucial system files become damaged or corrupt. On Windows 11, you can perform an SFC scan to ensure that your system files are intact.
- As was already said, open the Command Prompt window at a higher level.
- You need to type sfc /scannow and press Enter. Wait patiently, the scan could take a long time to finish.
Use Registry Editor to Enable Memory Integrity Forcibly
After attempting all of the solutions above, if you are still unable to activate Memory integrity in Windows 11, try turning on all of the Virtualization-based protection required for Memory integrity. A Registry Editor is required to complete this task.
- To open the Run dialog box, use the Win + R keys. In the box, type regedit and press Enter. Next, select Yes from the UAC window.
- Use the left navigation panel to find the following path in the Registry Editor window.
ComputerHKEY_LOCAL_MACHINESYSTEMCurrentControlSetControlDeviceGuardScenariosHypervisorEnforcedCodeIntegrity
- Double-click the Enabled key in the right panel after selecting the HypervisorEnforcedCodeIntegrity folder in the left panel. After changing the Value data from 0 to 1, click OK to save the modification.
What Causes Memory Integrity Errors on Windows?
A virtualization-based security feature called memory integrity protects your computer from malware that tries to take advantage of the Windows kernel. In the Windows Security app, under the Core isolation section, you can toggle it on or off.
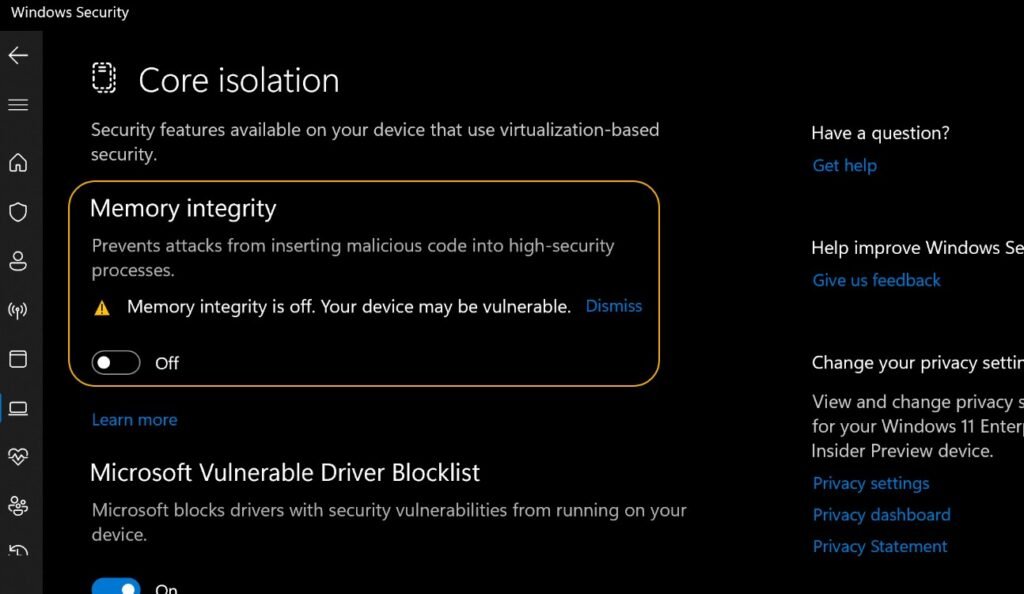
Go to the Device Security tab on the left after opening the Windows Security app, then scroll to Core Isolation. Sometimes, the memory integrity switch may show a grayed-out message that says Memory integrity is off. Your device may be weak.
Your drivers are typically connected to this problem. You’ll probably run into this issue if your drivers get corrupted for any reason, such as incorrect system shutdowns or a blue screen of death. When you attach a new device to your computer, you may also run into this problem.
In such circumstances, this notification indicates that there’s a chance the driver for the recently attached device is incompatible with your computer.
Apart from all those possibilities, it could be an issue with the interface. This indicates that while the functionality is operating as intended in the background, a Windows 11 interface problem is causing you to receive the notification. Now that you are aware of the typical reasons for the Windows 11 Memory integrity error let’s look at some possible fixes.
Review and Update Incompatible Driver
There will be a Review Incompatible Drivers option beneath the Memory integrity is off notice in the Core isolation window. This option will show you which incompatible driver is causing the problem.
You will see the incompatible driver’s product name, driver version, and published name. If all of these characteristics are not displayed when you click on the driver’s name, you can obtain them by running the DISM command.
To initiate the DISM command, launch the Start menu, input Command Prompt into the search bar, and choose Run as Administrator. Enter the following command in the elevated Command Prompt window and hit Enter:
dism /online /get-drivers /format: table
This tool will list every driver installed on your machine, along with other details. The incompatible driver that Windows Security identified must be located under the Published Name column.
Once you’ve found it, write down the supplier’s name. You will then need to update the incompatible driver. This should resolve the issue, which most likely stems from an old or corrupted driver.
Open Device Manager, click View, then choose Devices by Driver to update the driver.
Double-click the driver that isn’t compatible, then right-click the device in question and select Update Driver.
Select Search Automatically for Drivers. After that, Windows will look for and download the most recent driver for that particular device. Download the update from the device manufacturer’s website if Windows can’t find it.
For example, if the problem is with your keyboard driver, go to the keyboard manufacturer’s website and get the most recent driver update.
The update can be installed just like any other Windows application because it will be in the .exe format. Restart your computer after updating the driver to see whether the memory integrity problem is still occurring.
Delete the Incompatible Driver
If updating the incompatible driver didn’t resolve the issue, you should consider removing it entirely. It would help if you didn’t worry about any negative consequences from removing the driver because Windows will automatically reinstall it when you utilize the device in question.
Windows will, however, install the most recent functional driver for that device this time. Use the following command to retrieve the list of installed drivers and delete the incompatible driver: dism /online /get-drivers /format: table. Open Command Prompt as an administrator.
Input the command listed below and hit Enter. Ensure that the published name of the incompatible driver is substituted for <Published name>. pnputil /uninstall /force /delete-driver <Publisher Name>
For instance, the command would be pnputil /delete-driver oem58.inf /uninstall /force if the incompatible driver’s public name is oem58.inf. You’ll notice the message Driver Package Uninstalled after the command has been run. After that, restart your machine and see if the issue persists.
Download Any Available Windows Updates
The problem could be caused by a bug in the version of Windows you are currently using or a flaw in the Windows Security application.
In any case, you ought to look for and download any available Microsoft Windows updates. In addition to updating the Windows operating system, updates could also contain fixes for the Windows Security program.
Open the Windows Security app after downloading the updates for your Windows computer to see if the Memory integrity is off notice is still shown.
Execute a Clean Boot
Numerous services and programs on your computer are operating in the background to support the proper operation of the operating system.
These procedures or services occasionally have the potential to conflict with other programs, which could result in a number of problems, including the current one.
A clean boot will reveal which agent is causing the issue. After determining which process or service is causing the issue, you can choose to remove it or download any necessary driver updates.
Conclusion
We hope that the fixes above helped to resolve the issue. Now that you have activated memory integrity, a crucial security feature, you shouldn’t be concerned about hostile agents taking advantage of vulnerable Windows operating system components.
People Also Ask
What is Memory Integrity?
Windows 10 and 11 come with a feature called Memory Integrity that stops malicious malware and other threats from altering essential system files and settings, thus helping to keep the system safe. It accomplishes this by making sure that only legitimate code may be run and that malicious code is prevented from doing so. By guaranteeing that any modifications made to system files are authentic and validated, it also aids in the prevention of data corruption.
What does it mean if Memory Integrity is Off in Windows 11?
When Windows 11 Memory Integrity is disabled, it indicates that the functionality is not activated and that there is no defence against harmful software or other attacks on the machine. Data corruption and the execution of malicious code are possible if Memory Integrity is not enabled. Furthermore, modifications made to system files might need to be validated, which could cause instability in the system.
What makes memory integrity important?
Memory integrity is crucial because it helps shield the system against malicious code, corrupted data, and other security risks. Additionally, it helps maintain the safety and integrity of system files and settings, which can help avert system crashes and instability. It also helps ensure that only reliable code can run, which might help defend the system against harmful assaults.
How can I activate Windows 11’s Memory Integrity feature?
In Windows 11, click the Start button to enter the Settings menu, then choose the Update & Security tab to enable Memory Integrity. From there, choose the Windows Security option, followed by the Device Security tab. Under the Device Security menu, select the Memory Integrity option, then turn it on.
Are there any dangers involved in activating Memory Integrity?
Activating Windows 11’s Memory Integrity feature carries no risks. It is crucial to ensure that any programs that must function adequately are compatible with Memory Integrity before activating it, as some apps might not function appropriately if Memory Integrity is enabled.


