Are you looking for How To Put A Font On Your Computer? You may get dozens of fonts in different styles from the internet, and many of them are free. It’s straightforward to install fonts in Windows, regardless of whether you want to buy them directly from the manufacturer or download them for free! This guide teaches you how to find, download, and Put a Font on Your Computer.
How To Put A Font On Your Computer?
To Put A Font On Your Computer follow the following steps:
- Installing a font on a computer involves downloading the font files.
- If the font files are zipped, select extract from the menu after right-clicking the.zip folder.
- Right-click on a font and select Install to put it on your computer.
- Click yes if the application asks to make changes to your machine and you believe the font’s source.
Installing a font in Windows Vista, 7, 8, and 10
Install a font
- Go online and download a new font.
- Click on the folder where the new font you wish to install is located.
Before installing the fonts, unzip the file if the fonts are in a.zip file.
- Choose Open with a right-click on the font file.
- Select the Install option located in the upper-left corner of the window.
View available fonts
- First, access the Control Panel.
- Choose Fonts, followed by Appearance and Personalisation.
Click or double-click the Fonts option in the Control Panel when using the Small Icons or Large Icons view.
- You can see or remove the fonts that are installed on Windows right now in the Fonts box.
Installing a font in Windows 95, 98, Me, NT, 2000, and XP
- The slide opens the Control Panel.
- Give the Fonts icon a double click.
- Examine the fonts that are currently installed and add new ones using the Fonts box. To add a font, go to the File menu and select Install New Font from the drop-down menu.
- Find the directory where the fonts you wish to install are stored.

Before installing the fonts, decompress the file if the fonts are included in a.zip file.
- Click OK after selecting the fonts you wish to install.
Installing fonts on a computer can also be done by using Windows Explorer to open the Fonts folder. This folder is typically located in C:\WINDOWS or C:\WINNT\FONTS. Choose the fonts you wish to install from a different folder once this folder is open, then copy & paste them into the Fonts folder.
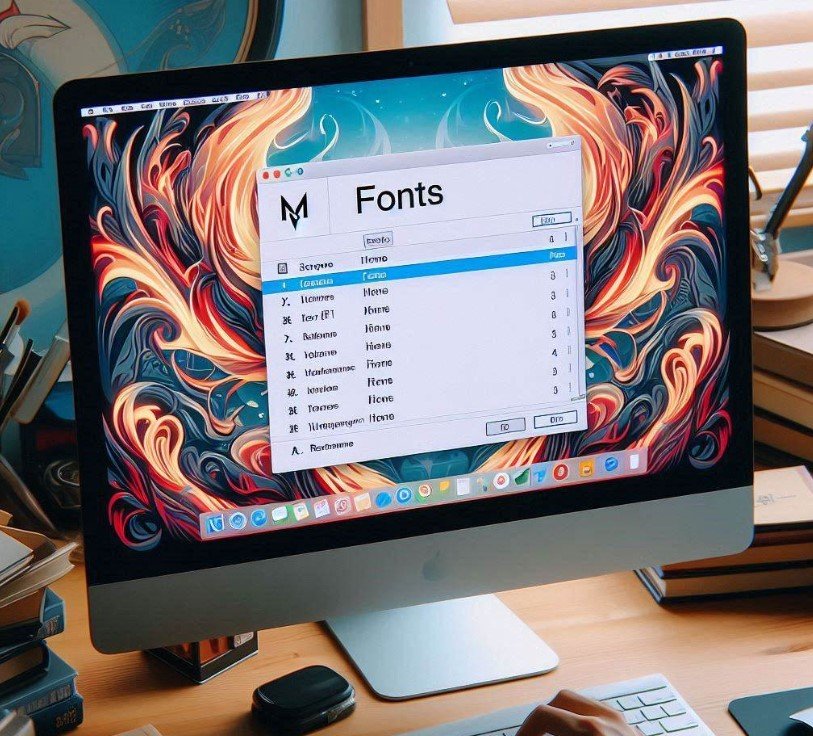
Installing a font in macOS
- Toggle between the Dock at the bottom of the screen and the Finder icon.
- Click the Application choice in the Favourites area on the left side of the window.
- To start the software, click the Font Book icon.
- Click the File selector in the Apple menu bar at the top of the screen.
- Click the drop-down option and select Add Fonts to Current User.
- Find the font file you wish to include and select it by clicking Open.
Fonts can be installed by dragging and dropping them on the Font Book icon in the Dock, provided you have recently used Font Book or have the application pinned.
How to Add Fonts to Microsoft Word?
Using Microsoft Word fonts will help your paper stand out and have a better visual appeal! This is how you do it:
- To open the font file (.ttf or. of), locate it and double-click.
- Select Install Font on a Mac.

Remember to review the licensing terms before adding typefaces. You may now experiment with different typographic settings to create your distinctive work!
Understanding Fonts in Microsoft Word
Fonts are essential to understanding while designing documents in Microsoft Word. They enable the expression of your message and provide the text with a polished appearance.
Microsoft Word offers three ways to install fonts:
- Make use of the installed fonts. These offer a plethora of options for every kind of document style.
- Acquire additional typefaces from the internet. Several websites offer premium or free typefaces. Make sure the ones you choose are Word-compatible.
- Purchase font bundles offline or online. These include a plethora of expertly created fonts that can elevate your document.
It’s simple to add the typeface to Microsoft Word. After downloading the file, install it on your PC. Microsoft Word will then be able to access it.
Keep in mind that compatibility can be a problem when using custom fonts. Save the document as a PDF or embed the font inside the file to prevent any surprises.
Installing & Adding Fonts in MS Word
Step 1: Finding And Downloading Fonts
For personalization, you need to add new fonts to your papers from Microsoft Word. How to do it is shown below:
- Use the Microsoft Office website or find a trustworthy font website.
- Look through the fonts to select one that suits your needs.
- Click on the font to find the Download button.
- Save the font file to the downloads folder on your PC.
- Double-clicking the downloaded font file will cause it to open.
A preview window containing all of the font’s characters will open when the font file is opened. Check to see if it meets your needs with this.
Click the Install button in the preview window to begin installing the new font on your computer. By doing this, you can utilize the font in Microsoft Word and other applications by adding it to your System’s library.
Pro Tip: Verify that any fonts you download and install are compatible with both Microsoft Word and your operating system before proceeding. By doing this, any compatibility problems when employing them are avoided.
Step 2: Installing Fonts On Your Computer
- Locate the desired font: Check for it on websites that sell or give away fonts. Locate a trustworthy source.
- Get the file here: After selecting the download option, save the file to your computer. Remember where you saved it.
As needed, extract the files: If the font is contained in a zip file, extract it. Click Right-Click on the file, pick Extract All, and then choose where to save the files. To install the font, right-click on the file and Choose Install from the menu. The font will then be accessible in Word.
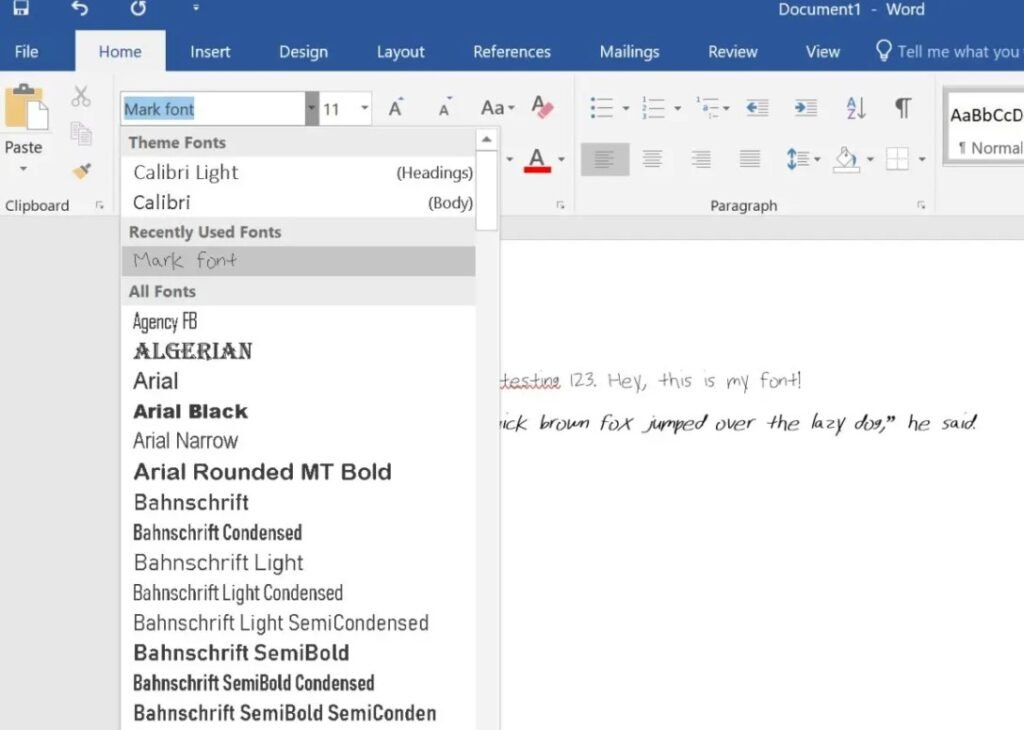
- Verify the installation: Navigate to the Fonts menu in Word. There, look for the installed font.
- Apply the updated font: Click the Fonts menu icon, select it, and begin typing.
Keep in mind that in order to use fonts on any device, you must install them first. Additionally, to reduce security concerns and compatibility problems, download fonts only from reputable sites. These days, adding distinctive typography to your papers is simple!
Step 3: Adding Fonts To Microsoft Word
For a project, a graphic designer requires a particular font. They looked for hours before discovering the ideal handwritten font. They did the following to add it to Microsoft Word:
- Get the typeface from a reliable source.
- Take out the files from the zip archive.
- With a right-click on the font file, choose Install.
- Once Microsoft Word is open, select the File tab.
- Choose Options and proceed to the Fonts subsection.
- Select Add New Font and find the font file that has been downloaded.
- To install the typeface, click OK.
- In order for the new font to show up, restart Microsoft Word.
Use caution when adding typefaces, as adding too many can cause instability or slowdown in your computer. Make sensible choices and install only what you require!
Troubleshooting Common Issues
Do you need help importing fonts into Microsoft Word? There are a couple of solutions, so don’t worry.

- Do fonts need to show up? Verify that the font is installed successfully and is compatible. On a Mac, navigate to Font Book or Control Panel. If it still isn’t visible, consider restarting Word or your computer.
- Is the font spacing incorrect? The kerning settings can be the cause. In Word, navigate to the Font tab under the Home menu and choose Advanced. Once the proper spacing is achieved, adjust the kerning value.
- Incorrect font size? Choose the text, select the Font option, and manually adjust the font size to your preference.
Additionally, confirm that the fonts you download are appropriate for your version of Microsoft Word and that you are getting them from reliable sources. Prevent issues by:
- Consistently updating Microsoft Word.
- Using reliable font suppliers.
- Looking through internet forums or troubleshooting tips.
You may quickly fix font problems and make your papers look beautiful by doing this.
Conclusion
Depending on the language package you’re using, Windows 10 comes preinstalled with a variety of font kinds, but you can also discover a vast selection of fonts online, both for free and for a fee. It’s relatively easy to install these fonts on your Microsoft Windows 10 computer.
You can edit your papers whenever you need to after installing the fonts. Before sending out any documents, make sure they are saved as PDFs. This way, even if someone doesn’t have the required fonts on their machine, they may still view the content as intended.
Frequently Asked Questions
How do I install missing fonts on my computer?
After launching the System> Optional features window, follow these steps to add font:
Next to the Add an optional feature, select the View features button.
When the window for adding an extra feature opens, locate the one you want to use and click the box next to it to add a supplemental font.
How can I alter the computer’s font?
The Control Panel should be easy to find and open
In the Control Panel’s upper right corner, choose View by Category. Select Appearance and Personalisation after that.
Click Change Fonts settings > Restore default font settings in the window that appears.
How can I utilize the fonts on my keyboard on a computer?
To choose a font, either click in the Font drop-down box or use the Alt and F keys on your computer (or press Tab). You can use the up and down button keys or your mouse to choose a font. Use the keyboard shortcuts Alt and E (or Tab) to navigate to the Size drop-down box.
How are custom fonts installed?
Click My Computer twice. After that, double-click the Fonts and Control Panels buttons. pick the File menu and pick Install New Font from the Fonts window. Open the folder containing the fonts you wish to install.


