How Do You Record On Windows 10? [Fast & Easy Guide]
This article aims to provide information on How Do You Record On Windows 10? Screen recording is integrated into both Windows 10 and Windows 11 through the Xbox Game Bar tool. However, there are certain restrictions, such as the inability to record the entire desktop and the failure to record more than one app at once.
To Record on Windows 10 follow the instructions given in this article. Although you can select a specific area of the desktop and use screen recording if you have Windows 11, Snipping Tool isn’t a great option either (it can’t record audio, for example). If you want more possibilities, you should also utilize a more feature-rich third-party screen recording program like OBS or EaseUS RecExperts.
How Do You Record On Windows 10?
You can easily take a video of what’s on your screen with the Xbox Game Bar. Before going any further, make sure you’ve turned on the Xbox Game Bar as described in Turn on Xbox Game Bar.
- Start up the app or game you want to record
- To begin recording a clip, use the Windows logo key along with Alt+R. You hear the narrator say, Recording in progress.
- You can turn the microphone on and off while it is recording by pressing the Windows logo key and Alt+M at the same time. To see how to use the Game Bar, press the Windows logo key + G. A voice says, Xbox Game Bar window.
- Use the program or play the game until you’ve recorded the desired amount of time, then hit the Windows logo key plus Alt+R to end recording. You hear the narrator say, Game clip recorded.
The video is saved as an MP4 file in a folder named Captures within the Videos folder. In addition to the recording date and time, the file name includes the name of the game or app.
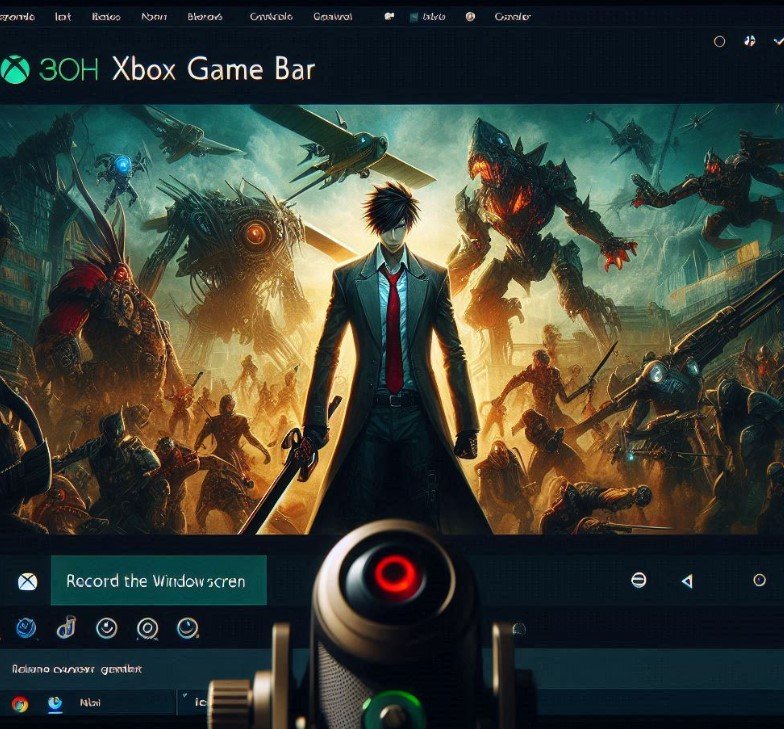
Record the Windows Screen with Xbox Game Bar
CPU and GPU monitoring are among the many capabilities that the Xbox Game Bar, which is integrated into Windows 10 and Windows 11, offers. The most useful thing about it, though, is that it can record Windows screen and save the movie as an MP4.
Although Xbox Game Bar can only be used within a single application at a time and cannot capture the Windows desktop or File Explorer, it performs just as well in other programs like Chrome as it does in games.
If you wanted to show someone how to use many programs, like generating a web page in a code editor and viewing it in a browser, you would need several films. Furthermore, you are unable to demonstrate to them any of the features of the Windows 11 or 10 UI, including the Start menu.
We’ll demonstrate how to screen record with OBS and EaseUS RecExperts, two other tools that you should utilize for such tasks, later in this post.
- Open the app you want to record with a click.
- Press the Windows Key, Alt, and R keys to begin screen capture. Somewhere on the screen, probably in a corner, is a tiny recording widget that indicates how long you’ve been recording. Although the keyboard shortcut is considerably more accessible, you can also get here by opening the Xbox Gamebar (Windows Key + G) and then locating the capture widget.
- You can take any action you like, and record sounds using your microphone. If you don’t want to record any sound, you can also silence the microphone.
- To terminate the screen recording, press Windows Key + Alt + R once more. You can also press the widget’s stop button. A message stating, a Game clip recorded, will appear. Clicking on it will take you to the Gamebar app’s Gallery, where you can see a preview of the video you took. You can also find the MP4 file you recorded in the Videos/Captures folder.
Configuring Xbox Gamebar Screen Recording
There are a few parameters you can adjust, even though the default settings are usually suitable for most people.
- Go to Settings->Gaming->Captures first.
- Modify any of the subsequent configurations. Although they refer to it as a game, any program you record should be covered by the settings, regardless of whether it is a game or not.
- Record what happened (Windows 10) / Background Recording (Windows 11): this automatically records video for a buffer of up to 30 seconds or more if you adjust the settings. Accordingly, even though you weren’t actively screen recording the thirty seconds that had passed, you could still save them if you were playing a game and had just made an incredible kill by using Windows key + G to launch the game bar. Although Windows 11 and 10 have different names for this setting, the feature is the same.
- Maximum recording length: The duration of screen recording before it automatically ends. In my opinion, this should be left at the default two hours.
- Record audio while playing a game: By default, this records only the sounds produced by your microphone and the game, leaving out any background noise from Windows or other programs. You have the option to turn off audio recording entirely, allow system sounds to be recorded, or adjust the balance.
- Video frame rate: you can adjust it to 60 frames per second (fps) by default.
- Select between standard and high video quality.
- Capture mouse pointer during game recording: If you are recording an application other than a game, leave this enabled.
Screen Recording Custom Regions With Snipping Tool
With Windows 11, you can use the Snipping Tool’s screen recording tool to make a box around the part of the desktop you want to record.
This might be a particular window, or it could be just the space that the Start Menu occupies if you’re attempting to create a tutorial on how to use it. You can make a box around the entire desktop if your application’s window might move or fill the screen.
Use the Snipping Tool in Windows 11 to record the screen by doing the following steps:
- Open the Snipping Tool first. Pressing Windows + Shift + S is the simplest way to accomplish this. This will send you directly to the screen where you may click a button to start recording instead of launching the main Snipping Tool window.
- If you haven’t already, click the video camera icon to activate screen recording mode.
- Encircle the area of the screen that you want to capture with a box. Draw a box enclosing the desktop if it takes up the entire screen. Draw the area around the window if there is one.
- Click to mute or unmute the system noises and microphone. Of course, leave the microphone on if you wish to record yourself speaking.
- Press the button to begin recording.
Following a countdown, the Snipping Tool will begin to record your screen.
- Select Pause to put the recording on hold or Stop to end it.
If you pause the recording, you can use the Play button to resume it. You can also play back the video you just recorded in the preview box that appears once you stop recording your screen.
- To save your screenshot as an MP4 file, press CTRL + S or click the Save button. The program supports only one file format.
Screen Recording with EaseUS RecExpert
In Windows 11, the Snipping Tool lets you record any part of the screen and sound. But if you want to record a lot of screen material, you should use a third-party program with more features.
If you’re willing to pay for an app, RecExpert from EaseUS is a good option. It lets you record parts of the screen or the entire screen and has many cool features that you won’t find anywhere else, like capture scheduling, custom watermarks (if you want one), adding annotations to videos while they’re being recorded, and a basic built-in editor for trimming videos.
You can get and use RecExpert for free, but it can only keep videos that are one minute long. RecExpert’s regular costs are $20 for a one-month membership, $40 for a year, and $70 for a lifetime license (we’d recommend purchasing the lifetime license instead of the subscriptions). Thankfully, there’s a discount available.
Using EaseUs RecExpert to record:
- Download and open the application.
- Depending on what you want to record, choose Full Screen or Region. If you choose Full Screen, you will have to decide which of your many monitors to record on.
- To begin recording, select Rec.
- To halt recording either temporarily or permanently, click the stop or pause button on the toolbar. Moreover, you can pause or stop by pressing F9 or F10.
You can click on any of the videos you recorded to play them again or modify them when you stop recording. I suggest clicking Edit and then selecting Trim to give you the option of choosing what to cut if, like me, your video has awkward moments at the start and conclusion.
Recording the Whole Screen with OBS Studio
Because OBS Studio is free and excellent at broadcasting games to Twitch and other websites, it is trendy among those who stream video games. But, if you prefer not to stream anything you do, you can also use OBS to record your whole screen in Windows 10 or Windows 11 and save it as an MP4 file.
Using OBS to record a Windows screen:
- Download OBS Studio, set it up, and run it. If this is your first time using OBS, you’ll be prompted to choose between optimizing it for streaming and recording exclusively. To optimize solely for recording, select Optimize just for streaming.
- The frame rate and base resolution, also known as canvas resolution, will also be requested from you. Selecting the screen resolution you want to record is advised (it can default to 1080p). You will only be able to capture part of the screen if you choose to capture from a screen with a higher resolution than your canvas size.
- If you, like me, have multiple monitors configured with varying screen resolutions, you can alter the canvas size later.
- To add a new source, click the Plus sign under Sources.
- Choose Screen Capture.
- When the dialog box appears, click OK. You can rename the source to something other than Display Capture if you like.
- Select a display and press OK. This would enable you to record the activity on one screen while using OBS on another if you have several monitors. There’s only one option if you have a single monitor.
- Your capture will be interrupted if the display extends beyond the boundaries of your OBS canvas. For instance, let’s say you are capturing a 4K display with a 1920 x 1080 base resolution. Change the base resolution in File -> Settings -> Video to resolve the issue. This is also where you set the output resolution. OBS will scale the output down while maintaining everything in the frame if the base resolution is larger than the output (a 1080p output on a 4K screen, for example).
- If you do not want the sound of the desktop or the microphone recorded, muffle the audio of those devices. OBS will automatically record sounds from your computer’s default audio input device and any active apps. Click the speaker icons in the audio mixer to muffle those.
- Press the Start Recording icon in the lower right corner of the screen. If you didn’t mute the microphone or desktop audio, any noise you or the computer produced will be recorded.
- If you are screen recording from the same display as OBS, reduce its size.
- When you’re done, click Stop Recording in OBS.
Your screen capture films will, by default, be stored in the Windows 11 (or 10) films folder. By default, they are kept as files with the extension. mkv. However, by accessing OBS’s Settings->Output menu, you can modify the output to MP4 or MOV files.
Conclusion
And that’s it! You now know how do you record on windows 10 with audio, whether you want to utilize the built-in features like Game Bar or third-party programs like TechSmith’s Snagit and Camtasia.
Screen recordings might help you communicate with your audience in an understandable manner. This implies that you won’t need to plan Zoom conversations to help a colleague through a procedure or hold endless meetings to clarify basic responsibilities. You can just email them a screen capture going forward!
Frequently Asked Questions
How can I record a video on Windows 10?
Press the Windows logo key with Alt + R to begin recording.
The floating widget will instantly start recording. Step 3: After you’ve finished recording the screen and pressed the white and blue buttons, the recording will end and be saved right away.
Is there a screen recorder in Windows 10?
A screen-recording feature designed primarily for gaming is available in Windows 10 and 11, albeit it can record almost any kind of screen activity. And there’s an even better alternative with Windows 11. There are occasions when I have to capture screen activity in Windows for an online lecture, lesson, or presentation.
Does Windows 10 have a recorder?
Make sure that the Windows 10 voice recording app is already on your computer before you start using it. Download the app and search for a voice recorder using the Start menu search box, then choose the most appropriate result. Either select the Record button or use Ctrl + R to begin recording.


