Have you ever experienced “ASUS Motherboard Yellow Light”? This article will investigate the mystery surrounding the yellow light on motherboards in this guide, hoping to clarify its meaning and consequences. Through an examination of probable causes and troubleshooting techniques, users may arm themselves with the information necessary to efficiently navigate through potential issues.
ASUS Motherboard Yellow Light
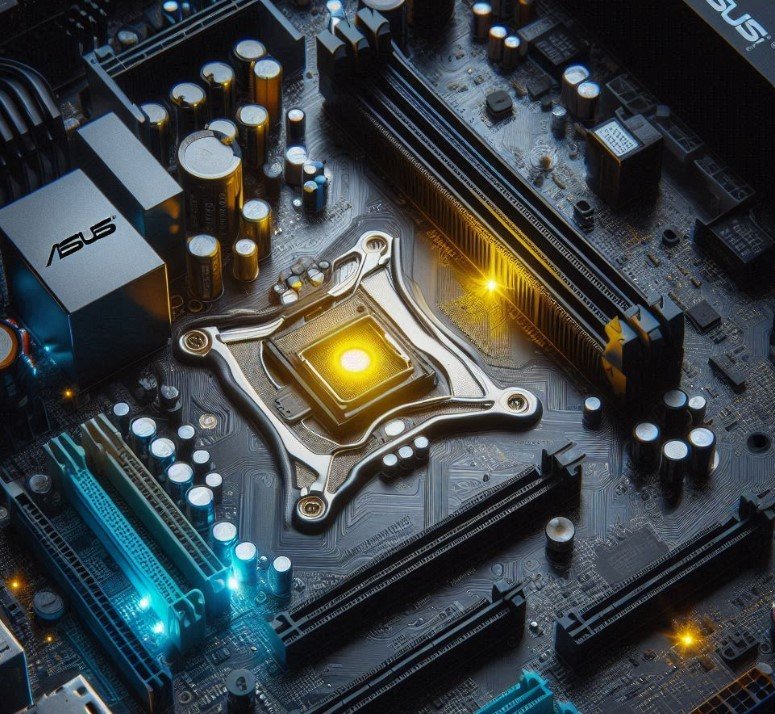
When a yellow light appears on the motherboard, it typically indicates that there are several issues affecting the RAM’s compatibility and functionality.
What Is A Steady Yellow Light On A Motherboard?
The BIOS or firmware may have incorrect or misconfigured RAM frequency, timing, or voltage settings, which can result in instability and the yellow light on the motherboard. System instability may arise from aggressive BIOS settings or settings that are not appropriate for the supplied RAM.
This problem can be fixed by going into the BIOS and restoring the settings to their original positions. For added stability, users can manually modify the RAM-related settings under the RAM manufacturer’s standards or the motherboard’s supported configurations.
Users can more efficiently troubleshoot the yellow light connected to DRAM by being aware of these possible causes. Ensuring that the RAM performs optimally within the motherboard’s specifications and restoring the system to proper functionality can be achieved by implementing the necessary corrective steps.
To identify and fix more complicated issues, it might be required to consult a trained expert or the motherboard manufacturer if troubleshooting techniques prove ineffective.
Causes for Yellow Light on ASUS Motherboard
These are the specific possible causes.
Inadequate or Incompatible RAM
Specific specifications relate to the kind, speed, and capacity of RAM modules that motherboards can accommodate. Errors, unstable systems, and in certain situations the yellow light indicator can result from using RAM that does not fit the motherboard’s specs or is incompatible with the modules already installed. System performance may be impacted by conflicts that arise from combining multiple RAM types with different timings or speeds.
To make sure that the RAM they are using is compatible with the motherboard, users should consult the manual or specs of the board. For best compatibility, while adding or upgrading RAM, the new modules must fit the old ones exactly, or you should get an entire set of RAM modules that are similar.
Improperly Seated RAM
Installing RAM modules correctly is essential to dependable system performance. Data transfer interruptions and poor connections may result from a RAM module that is not firmly and accurately placed into its slot. Intermittent problems and the yellow light signal may result from inconsistent contact between the RAM and the motherboard.
Users should make sure that all RAM modules are securely inserted into their slots and shut down the computer to fix this problem. Gently press the modules into position until they click and become secure. It’s crucial to double-check the motherboard handbook for the proper RAM installation instructions.
Is Yellow Light On Motherboard Bad?
Yes, the yellow light on the motherboard is bad. Because RAM modules are electronic parts, they are susceptible to manufacturing flaws and ageing just like any other hardware.
Poor performance, frequent crashes, data corruption, and system instability can all be caused by one or more malfunctioning or damaged RAM modules. During initialization, if the motherboard finds a fault with the RAM, it could turn on the yellow light to notify users of the issue.
Users can use diagnostic software such as Memtest86 to perform memory checks or can follow the motherboard manufacturer’s step-by-step instructions to identify damaged RAM modules. Users can identify which RAM module is malfunctioning and swap it out for a working one by testing each RAM module independently.
How To Fix Yellow Light On Motherboard?
A yellow light on your motherboard indicates that there may be a problem with the power supply or hardware of your computer rather than being an error code in and of itself. The following are typical reasons and actions to identify and resolve the problem:
Issues with the Power Supply
It is advisable to seek advice from a computer repair expert if you suspect a defective PSU. Verify that it is correctly attached to the motherboard and receiving power. For power supply problems, Century IT Consultants provides expert diagnosis and replacement services.
Overheating Concerns
- Overheating can result in several motherboard issues, such as the yellow light problem. Verify that the heat from your CPU and GPU is not excessive.
- Make sure all of the fans in your computer are operating properly and dust off the interior of the case.
- If required, reapply the new thermal paste to the CPU.
RAM Troubleshooting
- To troubleshoot RAM, try rearranging your RAM modules. Bad connections can occasionally cause the yellow light to appear.
- To find any defective RAM modules, try starting your computer using each RAM stick separately if you have more than one.
Problems with Graphics Cards
- Verify that your dedicated graphics card is correctly positioned in its PCIe slot if you have one.
- If integrated graphics are available, try your system with them to see if the GPU is the problem.
Issues with the BIOS or CMOS
- Occasionally, a broken or faulty BIOS might cause problems with the motherboard.
- Attempt to reset the BIOS using the motherboard’s reset jumper or by taking out the CMOS battery
- Use caution when you reset the BIOS because it may change the settings on your machine. Seek expert guidance as necessary.
Examine Any Visible Damage
Visually check your motherboard for physical damage, such as burned parts or broken lines. If you find any damage, get in touch with Century ITC, a computer repair specialist, for a proper evaluation and possible motherboard replacement.
Minimal Component Testing
The CPU, RAM, GPU (if integrated graphics are not present), and power supply connectors are the only important parts that should remain connected to your motherboard. Gradually reintroduce components one at a time to determine the cause of the problem.
Check for Error Codes
Some motherboards come equipped with fault code displays or diagnostic LEDs. The handbook for your motherboard might help you decipher any problem messages that appear during boot.
Why Is There A Flashing Yellow Light On My ASUS Motherboard And My PC Won’t Boot Up?
Your ASUS motherboard’s flashing yellow light usually signals a hardware problem, such as a malfunctioning CPU, memory, or other important parts. This may make it impossible for your computer to boot up properly. Typical reasons for this issue include the following:

- CPU problems: The CPU might not be compatible with the motherboard, be damaged, or be incorrectly installed.
- Memory issues: One or more RAM modules may be malfunctioning, incorrectly placed, or incompatible.
- Problems with the power supply: The system’s components could not be receiving enough or consistent power from the power source.
- Motherboard failure: If the motherboard isn’t working properly, the system might not be properly initialized.
PC Stays On Yellow Light And Won’t Boot After Restart
If you have more than one RAM slot on your motherboard and you are having problems with the yellow light, try booting the computer using each RAM module independently.
Take off all RAM modules except for one and try to boot the computer. To determine whether a particular module is the source of the problem, repeat this procedure with each module. This step assists in identifying defective or troublesome RAM.
This indicates a RAM or CPU connection issue. You can try several things to debug and fix it.
Turn off your PC’s power supply before shifting components. For all of the instructions below, switch off the power before making any PC adjustments and turn it back on before rebooting. To ground the PC, I would keep it connected but turn off the power at the wall or use the PSU button on the back (if there is one).
Try restarting after removing all RAM modules except one. Try shifting the last RAM module to another slot. Try all 4 RAM slots. If it fails, try another module. This can determine if the module or slot connection is the issue.
If you just have one RAM module, it’s harder to determine if the problem is with that module, but if you have another desktop PC that uses DDR4, you can borrow a module to test in your new motherboard and see if it works. If the problem is a short circuit, placing working RAM in a damaged RAM slot (or vice versa) may damage the other component.
If one RAM slot fails, you can request a motherboard refund or replacement, or use the other slots. You should also get a refund or replacement for damaged RAM. DDR4–3200 CL16 is the slowest I would use with an i5–13400F, and 3600 CL16 is usually best for price/performance).
Your RAM is slow (DDR4-2666), so a B760 motherboard and i5–13400F should be able to run it, but the motherboard’s memory training may have been off. If you add or remove RAM, the memory should automatically retrain, but if not, wipe CMOS and try again.
Removing the BIOS battery for 10 seconds or shorting the two “CLRTC” pins at the bottom right of the motherboard (e.g., using a screwdriver) for 10 seconds (be careful not to damage the pins) will do this. If you reboot, the RAM should retrain after this resets all BIOS settings, including memory latency.
Your CPU may be improperly placed or dirty in the socket. This could short out or miscontact the CPU socket pins that connect the CPU to the RAM slots. If nothing works, remove the CPU, check for damage and debris, and then gently wipe the underside with a clean cloth and isopropyl alcohol (or distilled water if the CPU is 100% dry afterward).
Acetone dissolves CPU substrates and destroys them. Installing it again. Socket pins are brittle, but a steady touch can bend them back. If socket pins break, you may require a new motherboard (socket replacement is doable but more expensive).
A BIOS update can fix RAM compatibility and training issues, but this motherboard doesn’t enable BIOS flashback, thus you need a CPU and RAM to upgrade it. If the BIOS is the issue, you may have to replace the motherboard or send it back to the seller or repair business for an update.
Your CPU’s memory controller may be damaged or malfunctioning, but Intel’s quality control is superb and CPUs are hard to harm internally without causing outward damage. It may be the motherboard and RAM if the problem persists after replacement.
How Do I Interpret the Asus Motherboard LED And Beep Patterns?
There is no swapping out of modular cables! Most have completely arbitrary pinouts that vary depending on the vendor, but they all use the same six-pin connections to connect to the PSU. Examine both the new and the old cables closely.
The wires that emerge from the ends are probably arranged differently. I am even more convinced that this is a reverse polarity issue rather than dust shorts because you lost two hard drives. Try swapping out the DDR RAM memory module and cleaning it!
Unlock the locks on both sides of the memory slot to remove the RAM from your PC by opening the side cover. Use caution and turn off your computer while doing this. If this functions well, great; if not, there might be a motherboard issue.
ASUS Motherboard Light Codes: Orange, Red, And Then White Light On ASUS Motherboard
The motherboard handbook describes the orange light as yellow, but if you mean the one directly below it, that is the RAM light. The red light is the CPU.
These are debug LEDs, and the motherboard label next to them indicates which component they are pointing to. During POST, they activate while the component is being tested. If it switches off, there isn’t a problem with the part. If the LED remains on, there is a problem.
Motherboard Yellow Light No Display
To reach the motherboard, carefully pry open the device’s case. Check to make sure each RAM module is securely and accurately positioned in its designated slot. To make sure the modules are firmly locked in place, gently press down on each one.
The yellow light may appear and cause connectivity problems if the RAM is loose or not installed correctly. To reach the motherboard, carefully pry open the device’s case. Check to make sure each RAM module is securely and accurately positioned in its designated slot.
To make sure the modules are firmly locked in place, gently press down on each one. The yellow light may appear and cause connectivity problems if the RAM is loose or not installed correctly.
Yellow Light On Motherboard Lit
The motherboard handbook states that the light indicates a DRAM problem.
ASUS Motherboard Troubleshooting Via Q-LED Indicators
Please take the following troubleshooting actions:
- Put the CPU back in place
- As seen in the pictures below, see if the CPU Pin or CPU Socket Pin has any dirt on it. If so, kindly tidy it up and give it another go.
- Inspect for any damaged CPU pins. In that case, kindly try a different CPU.
- Please replace the CPU if the problem still persists after doing steps 1 through 3.
ASUS ROG X570-F Yellow DRAM Light, No Boot/ Post
Turn off the unit’s power supply, flip the PSU off, and disconnect the PSU cord from the wall or power source. For roughly three to five minutes, remove the motherboard’s CMOS battery. In certain instances, taking out the graphics card could be required to reach the CMOS battery.
To exhaust any remaining charge that might be in the CMOS circuit, push the power button on the casing continuously for 15 to 30 seconds during the five minutes that the CMOS battery is detached from the motherboard. Reinstall the CMOS battery, being certain to do so with the right side facing up the first time, once the five minutes have passed.
If you had to remove the graphics card, you may now reinstall it. Just make sure to reconnect the display connector and any power connections that were connected to it. Replug the power supply cable, turn the PSU back on, and turn on the system now.
It ought to show the POST screen along with the CMOS/BIOS setup choices. Launch the BIOS setup application and adjust the boot configurations for the Windows boot manager or, in the case of older systems, the drive on which your operating system is installed if required.
Save the configuration, then close the window. You can proceed from there if the system will POST and boot. This includes going back into the BIOS and adjusting any additional custom settings you might need to set up, like Memory XMP, A-XMP or D.O.C.P profile settings, custom fan profile settings, or any other particular settings you might have set up in the past but lost when you reset the CMOS.
In certain instances, loading the Optimal default or Default values in the BIOS after a reset and saving the configurations can be required to force the hardware tables to reset in the boot manager. To avoid having to do it twice, complete this before adjusting your custom settings.
ASUS ROG Z790 Dark Hero Motherboard Yellow Light For DRAM On
About the problem you mentioned, if the motherboard is unable to boot and the DRAM Q-LED indication illuminates, there is an irregularity in the memory during the boot procedure.
To verify whether the system can boot into BIOS, you might want to think about installing the CPU solely for integrated graphics output, placing one RAM module in the DIMM_A2 slot, and connecting the PSU.
Furthermore, please consult the user manuals for the motherboard and liquid cooling system to confirm that all hardware and connecting connections are connected correctly.
ROG STRIX Z790-H Yellow/Amber Post Light On Mobo
A Yellow Light On Motherboard ROG Strix typically indicates a memory problem. A different brand of new RAM was tried, however, the same thing happened when the RAM was reseated a few times in different slots. I tried using a USB to flash the BIOS, but it didn’t work.
Red CPU light and yellow dram light on motherboard
This is really out of the ordinary. RAM slots don’t simply wear out. They are an inactive part of the board. The integrated memory controller, or IMC, located inside the CPU is actually in charge of them.
Most likely, the CPU had an issue while your board was functioning well. Thus, cease swapping out boards; you should now probably test with a different CPU.
What Does Yellow Light In CPU Mean?
Certain computers employ a yellow light that either remains stationary or blinks slowly to signal when it has gone into sleep or hibernation mode. The computer may appear to be off while it is still on due to the yellow light, which shows that the computer is in a power-saving mode.
Keep in mind that shutting down a computer while it’s in sleep or hibernation mode can damage it. When in Sleep mode, the desktop state is stored in RAM, but when in Hibernation mode, it is saved on the hard drive. This is the difference between the two power modes.
Conclusion
A yellow DRAM light on the motherboard indicates RAM module difficulties. This visual cue can be caused by broken RAM, incompatible RAM, incorrectly seated modules, or misconfigured BIOS settings.
Users should take a systematic strategy to fix the yellow light issue. This covers appropriate RAM module seating, testing each module, checking motherboard compatibility, resetting BIOS settings, and running Memtest86 to test memory. These procedures help users detect and fix DRAM issues, restoring device stability and performance.
Remember, understanding the motherboard yellow light allows users to act quickly to prevent data loss, hardware damage, and system instability.
To diagnose and fix more sophisticated issues, consult a specialist or the motherboard’s manufacturer if troubleshooting fails. Monitoring the motherboard DRAM yellow light, ensures system performance and user satisfaction.
Frequently Asked Questions
What does my ASUS z790 H’s yellow light mean?
A red light indicates a memory setting failure, while a yellow light indicates a memory test attempt. If the memory settings pass the initial start-up post, the LED will become white. But you still need to make sure your memory is stable.
What does a PC’s yellow light mean?
Typically, the yellow light signifies that the computer is in the power-saving mode. Try it first, and if it doesn’t work, try it again while holding down the power button for 30 seconds while the gadget is turned off.
Is the motherboard’s orange light bad?
An error or particular circumstance could be indicated by an orange light. The motherboard lights may change color due to inadequate power or issues with the power supply unit (PSU). Overheating: To avoid overheating, contemporary motherboards are equipped with thermal sensors.


